

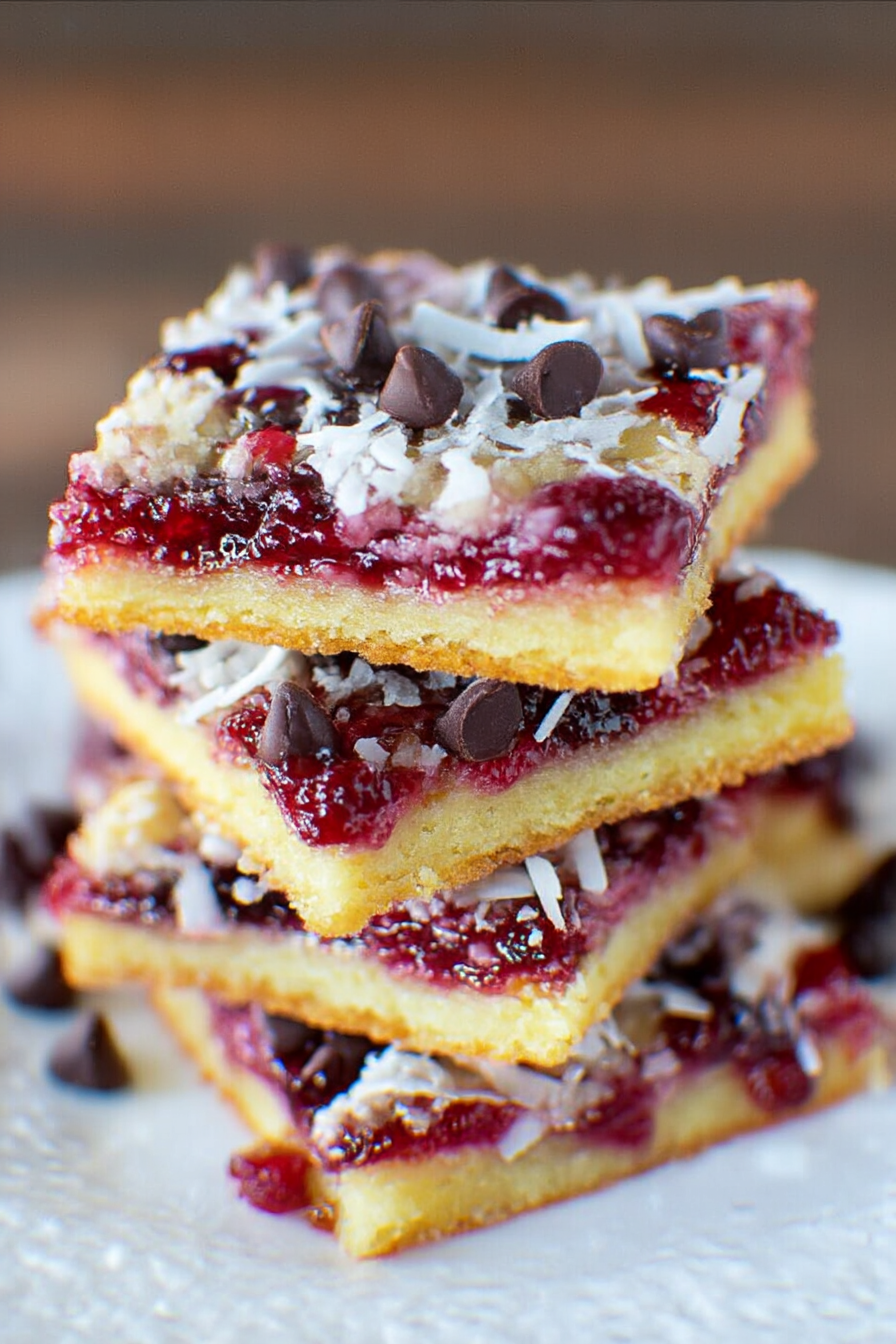
Imagine biting into a bar where tart raspberries dance with sweet coconut, all nestled on a buttery, crumbly crust. Raspberry Coconut Magic Bars are a symphony of textures and tastes, a delightful treat that will leave you craving more with every mouthful.
These bars aren’t just delicious; they’re practically effortless to make, perfect for any occasion or a simple afternoon delight. Think sunshine-filled picnics, joyful gatherings with friends, or a cozy night in. Get ready for an amazing flavor experience that will become a favorite in your recipe collection.
- These Raspberry Coconut Magic Bars are unbelievably easy to prepare, perfect for even the most novice baker.
- The burst of raspberry perfectly complements the sweet coconut, creating a harmonious and irresistible flavor profile.
- Visually stunning with layers of color and texture, these bars are as pleasing to the eye as they are to the palate.
- Enjoy them as a dessert, snack, or even a sweet addition to brunch; these bars are wonderfully adaptable.
Ingredients for Raspberry Coconut Magic Bars
Here’s what you’ll need to make this delicious dish:
The full ingredients list, including measurements, is provided in the recipe card directly below.
How to Make Raspberry Coconut Magic Bars
Follow these simple steps to prepare this delicious dish:
Step 1: Prepare the Crust
Preheat your oven to 350°F (175°C). In a large bowl, combine the flour, melted butter, and sugar. Press the mixture evenly into the bottom of a 9×13 inch baking pan.
Step 2: Layer the Coconut
Sprinkle the shredded coconut evenly over the crust. Make sure to cover the entire surface for maximum coconut goodness.
Step 3: Add the Raspberry Jam
Drop spoonfuls of raspberry jam over the coconut layer and gently spread it out. Don’t worry if it’s not perfectly even; the swirls will add character.
Step 4: Pour Sweetened Condensed Milk
Pour the sweetened condensed milk evenly over the raspberry jam layer. This will bind all the ingredients together and create a gooey, delicious texture.
Step 5: Sprinkle with Pecans (Optional)
If desired, sprinkle chopped pecans over the top. This adds a nice crunch and nutty flavor to the bars.
Step 6: Bake and Cool
Bake for 25-30 minutes, or until the top is lightly golden brown. Let the bars cool completely in the pan before cutting into squares. This will allow them to set properly.
Transfer to a plate and enjoy these delightful Raspberry Coconut Magic Bars with a cup of coffee or tea for the perfect sweet treat.
Why These Raspberry Coconut Magic Bars Are, Well, Magic (H2)
Let’s be honest. Baking can sometimes feel like a high-stakes science experiment. One wrong measurement and your masterpiece turns into a culinary catastrophe. But these Raspberry Coconut Magic Bars? They’re foolproof! You pretty much throw everything into a pan, bake, and voila! You have a dessert that tastes like you spent hours slaving away in the kitchen, even if it only took you a fraction of that time. It’s the kind of recipe that makes you look like a baking genius, even if your usual baking skills are, shall we say, “under development.” And trust me, your friends and family will think you’re some kind of dessert wizard!
These bars are more than just easy to make; they’re incredibly versatile. Need a dessert for a potluck? Raspberry Coconut Magic Bars are your go-to. Want a sweet treat to pack in your lunchbox? These bars are perfect. Craving something sweet after dinner? These bars will hit the spot. They are like the Swiss Army knife of desserts, always ready to come to your rescue, regardless of the occasion. And that’s the magic!
Variations to Make These Magic Bars Even More Magical (H3)
Okay, so you’ve mastered the basic Raspberry Coconut Magic Bar recipe. Now what? Time to get creative! These bars are a blank canvas just begging for your personal touch. One of the easiest ways to jazz them up is by swapping out the raspberry jam for other flavors. Strawberry, blueberry, or even apricot jam would all be delicious. Each flavor will give the bars a completely different vibe, so feel free to experiment until you find your favorite combination. Get ready to unleash your inner pastry chef and create some flavor magic!
If you are feeling particularly adventurous, why not try adding a layer of chocolate chips? Milk chocolate, dark chocolate, or even white chocolate chips would all add a delicious, melty element to the bars. You could even sprinkle some chopped nuts on top for added crunch and flavor. Walnuts, almonds, or macadamia nuts would all be fantastic choices. Just remember to have fun with it and don’t be afraid to get a little messy.
Dietary Adaptations for Everyone to Enjoy (H4)
Got friends or family with dietary restrictions? No problem! These Raspberry Coconut Magic Bars are easily adaptable to fit a variety of needs. For a gluten-free version, simply substitute the all-purpose flour with a gluten-free flour blend. There are many great options available at most grocery stores, just make sure to choose one that’s designed for baking. You may also need to add a binder like xanthan gum to help hold the bars together. And the best part? No one will even be able to tell the difference!
If you’re looking to cut back on sugar, you can use a sugar substitute in the crust and opt for a sugar-free raspberry jam. There are many natural sweeteners available that work well in baking, such as stevia or erythritol. Just be sure to adjust the amount according to the package directions, as some sweeteners are more potent than others. By making a few simple substitutions, you can create a dessert that everyone can enjoy, regardless of their dietary needs.
Troubleshooting Your Raspberry Coconut Magic Bars (H2)
Even with the simplest recipes, sometimes things don’t go exactly as planned. But don’t worry! I’ve got you covered. Here are a few common problems you might encounter when making Raspberry Coconut Magic Bars, along with some easy solutions to get you back on track. Because even baking magic needs a little help sometimes!
- **Crust Too Dry:** If your crust is too dry and crumbly, it could be because you used too much flour or not enough butter. Try adding a tablespoon or two of melted butter to the mixture until it comes together. Also, make sure you’re pressing the crust firmly into the pan to help it stick together.
- **Bars Too Gooey:** If your bars are too gooey, it could be because you didn’t bake them long enough. Try baking them for a few more minutes, until the top is lightly golden brown. Also, be sure to let them cool completely before cutting them, as they will firm up as they cool.
- **Jam Sinking to the Bottom:** If your jam is sinking to the bottom of the bars, it could be because the crust wasn’t pre-baked. Next time, try baking the crust for 10 minutes before adding the other ingredients. This will help create a barrier that prevents the jam from sinking.
Storage Tips to Keep Your Magic Bars Fresh and Delicious (H3)
Okay, you’ve baked your Raspberry Coconut Magic Bars, and they’re absolutely delicious. But how do you keep them fresh and tasty for as long as possible? Here are a few simple storage tips to help you maintain the magic. Because nobody wants a stale magic bar!
- **Airtight Container:** The best way to store these bars is in an airtight container at room temperature. This will help prevent them from drying out and keep them fresh for up to 3-4 days.
- **Refrigeration:** If you want to extend their shelf life, you can store them in the refrigerator. Just be sure to wrap them tightly in plastic wrap or place them in an airtight container to prevent them from absorbing any fridge odors. They’ll keep in the refrigerator for up to a week.
- **Freezing:** For longer storage, you can freeze these bars. Wrap them individually in plastic wrap and then place them in a freezer-safe bag or container. They’ll keep in the freezer for up to 2-3 months. When you’re ready to eat them, simply thaw them at room temperature for a few hours.
Final Thoughts on Raspberry Coconut Magic Bars (H2)
So there you have it! Raspberry Coconut Magic Bars – a dessert that’s easy to make, incredibly delicious, and endlessly versatile. Whether you’re a seasoned baker or a kitchen newbie, this recipe is sure to become a favorite. So go ahead, give it a try. Whip up a batch of these magical bars and watch them disappear before your eyes. And remember, the most important ingredient is always love (and maybe a little bit of coconut)! Happy baking!
Perfecting the Cooking Process
Efficiency is key! I like to get the crust baking while I prep the raspberry filling. This ensures the base is perfectly golden before the luscious, fruity layer is added. Assemble everything quickly to keep the oven time consistent and even.
Add Your Touch
Feeling adventurous? Swap the raspberries for blackberries or blueberries for a different berry burst. A sprinkle of chopped almonds on top adds a delightful crunch. For a citrusy kick, a little lemon or orange zest in the crust is fantastic.
Storing & Reheating
These bars are best stored in an airtight container at room temperature for up to three days, or in the refrigerator for up to a week. While reheating isn’t typically needed, a quick zap in the microwave can soften them up if desired.
Here are my top tips for nailing these Raspberry Coconut Magic Bars every time:
- Don’t overbake the crust! A light golden brown is your cue to pull it out and let it cool slightly before adding the topping. An overbaked crust is no fun for anyone.
- Use room-temperature ingredients. This ensures everything mixes together smoothly, especially the butter and cream cheese, leading to a more consistent texture.
- Let the bars cool completely before cutting. Trust me, patience is a virtue here! This allows the filling to set properly, giving you clean, beautiful slices.
(Personal anecdote formated as paragraph subheading (very important! don’t write any title for this paragraph))
I remember making these for a bake sale and they were gone in minutes! Everyone kept asking for the recipe; even the non-coconut fans were converted. It felt amazing!
Conclusion for Raspberry Coconut Magic Bars
These Raspberry Coconut Magic Bars are a delightful treat that’s surprisingly easy to make. With layers of buttery graham cracker crust, sweet coconut, juicy raspberries, and a creamy condensed milk topping, they’re a guaranteed crowd-pleaser. Remember to use thawed, drained raspberries, chill the bars before cutting, and store them properly for maximum enjoyment. Feel free to get creative with substitutions! This recipe is a versatile and fun baking adventure, perfect for any occasion. So, grab your ingredients and get ready to create some magic in your kitchen!
Print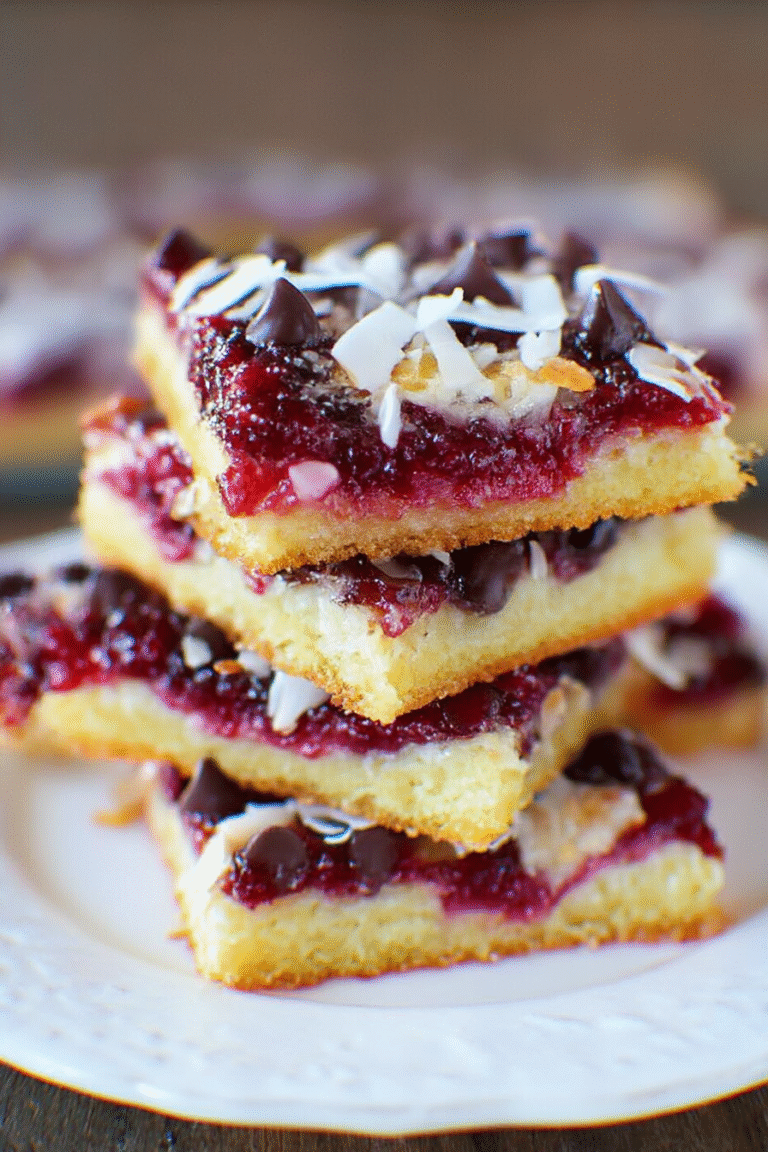
Raspberry Coconut Magic Bars
Delicious raspberry coconut magic bars recipe with detailed instructions and nutritional information.
- Total Time: 35 minutes
- Yield: 4 servings 1x
Ingredients
- 1 1/2 cups graham cracker crumbs
- 1/2 cup (1 stick) unsalted butter, melted
- 1 (14 ounce) can sweetened condensed milk
- 1 cup shredded coconut
- 1 cup white chocolate chips
- 1 cup fresh raspberries, gently crushed
- 1/2 cup chopped walnuts or pecans (optional)
Instructions
- Step 1: Preheat oven to 350°F (175°C). Grease a 9×13 inch baking pan.
- Step 2: In a medium bowl, combine graham cracker crumbs and melted butter. Press the mixture evenly into the bottom of the prepared pan to form a crust.
- Step 3: Pour sweetened condensed milk evenly over the graham cracker crust.
- Step 4: Sprinkle shredded coconut, white chocolate chips, crushed raspberries, and nuts (if using) evenly over the sweetened condensed milk.
- Step 5: Bake for 25-30 minutes, or until the edges are golden brown and the coconut is lightly toasted.
- Step 6: Let cool completely before cutting into bars.
Notes
- Store cooled bars in an airtight container at room temperature for up to 3 days, or in the refrigerator for up to a week for a firmer texture.
- A brief zap in the microwave (about 5-10 seconds per bar) will make the white chocolate extra gooey and delicious.
- Serve these bars chilled or at room temperature, and consider topping with a dollop of whipped cream or a fresh raspberry for an elegant touch.
- Gently crush the raspberries just enough to release their juices; over-crushing can make the bars soggy.
- Prep Time: 15 minutes
- Cook Time: 20 minutes
- Method: Stovetop
- Cuisine: American
FAQs
Can I use frozen raspberries for these Raspberry Coconut Magic Bars?
Absolutely! Frozen raspberries work beautifully in these bars. Just be sure to thaw them slightly and drain any excess juice before adding them to the recipe. This prevents the bars from becoming too soggy. Think of it as giving your raspberries a little spa day before their big debut in this magical treat. They’ll be plump, juicy, and ready to mingle with all the other delicious ingredients. It’s a simple step that makes a world of difference. Don’t skip it!
What’s the best way to cut these magic bars cleanly?
Patience, my friend, is key! Once the bars have cooled completely, pop them in the fridge for at least an hour. Then, use a large, sharp knife and run it under hot water before each cut. Wipe the knife clean between slices for professional-looking bars. This chilling process allows the layers to firm up, preventing them from crumbling or sticking to the knife. Trust me; your presentation will thank you. Besides, who doesn’t love a perfectly sliced bar?
How do I store my Raspberry Coconut Magic Bars?
Store these Raspberry Coconut Magic Bars in an airtight container at room temperature for up to three days, or in the refrigerator for up to a week. They taste fantastic cold, straight from the fridge. Just imagine reaching for a chilled bar after a long day! The cool, sweet flavors are incredibly refreshing. Plus, storing them properly ensures they stay fresh and delicious. So go ahead, bake a batch and enjoy them all week long!
Can I substitute the coconut flakes in these magic bars?
While coconut is a star player, you can certainly experiment! Chopped nuts like pecans or walnuts would add a lovely crunch and nutty flavor. Or, if you’re feeling adventurous, try using toasted oats for a different texture. Think of it as giving the bars a fun makeover! Just remember that the substitution might slightly alter the overall taste and texture. But hey, that’s the beauty of baking – getting creative and making it your own.


Leave a Comment