
Imagine the sizzle of chicken, kissed by spices, simmering in a creamy, dreamy sauce. Each spoonful is a journey, transporting you straight to a bustling Indian restaurant, without the need for a reservation or even putting on pants!
This isn’t just dinner; it’s an edible hug, a warm blanket on a chilly evening, and a culinary adventure all rolled into one. Restaurant-style Chicken Handi is your ticket to an amazing flavor experience, ready to make any occasion special.
Here are a few reasons why this Restaurant Style Chicken Handi will become your new go-to recipe:
- Effortlessly recreate an authentic restaurant experience in your kitchen with a simple-to-follow recipe that delivers maximum flavor.
- The rich tapestry of aromatic spices creates a deeply satisfying and complex flavor profile that dances on your taste buds.
- Served in a traditional Handi or any serving dish, this chicken dish looks stunning and is sure to impress your family and friends.
- Adaptable to your spice preference and dietary needs, this Chicken Handi pairs well with rice, naan, or even a side of roasted vegetables.
Ingredients for How to make Restaurant Style Chicken Handi
Here’s what you’ll need to make this delicious dish:
The full ingredients list, including measurements, is provided in the recipe card directly below.
How to Make How to make Restaurant Style Chicken Handi
Follow these simple steps to prepare this delicious dish:
Step 1: Marinate the Chicken
In a bowl, combine the chicken pieces with yogurt, ginger-garlic paste, turmeric powder, chili powder, coriander powder, cumin powder, and salt. Mix well, ensuring that the chicken is fully coated. Cover and refrigerate for at least 30 minutes, or up to 4 hours for maximum flavor infusion. The longer the chicken marinates, the more tender and flavorful it will become.
Step 2: Prepare the Base
Heat vegetable oil or ghee in a large pan or Handi over medium heat. Add finely chopped onions and sauté until golden brown. This step is crucial, as properly browned onions form the foundation of the dish’s flavor. Add the remaining ginger-garlic paste and green chilies (if using) and sauté for another minute until fragrant.
Step 3: Cook the Chicken
Add the marinated chicken to the pan and cook over medium-high heat until it is seared on all sides. This helps to lock in the juices and adds a beautiful color to the chicken. Stir occasionally to prevent sticking. Continue cooking until the chicken is partially cooked, about 8-10 minutes.
Step 4: Create the Sauce
Stir in the tomato puree and cook for another 5-7 minutes, allowing the tomatoes to cook down and reduce slightly. This deepens the flavor of the sauce. Add the cashew nut paste and garam masala and mix well. Bring the mixture to a simmer.
Step 5: Simmer to Perfection
Reduce the heat to low, cover the pan, and simmer for 15-20 minutes, or until the chicken is fully cooked and the sauce has thickened to your desired consistency. Stir occasionally to prevent sticking. If the sauce becomes too thick, add a splash of water or chicken broth to adjust the consistency.
Step 6: Finish and Serve
Stir in the heavy cream and crushed dried fenugreek leaves (Kasuri Methi). Simmer for another 2-3 minutes, allowing the flavors to meld together. Garnish with fresh cilantro leaves. Serve hot with naan bread, rice, or roti for a complete and satisfying meal. The creamy, flavorful sauce is perfect for soaking up with your favorite bread or rice.
Perfecting the Cooking Process
To master how to make Restaurant Style Chicken Handi, follow this sequence: Sear the chicken first to lock in those delicious juices. While it’s sizzling, prep your spices and aromatics. Build your sauce in the same pan, infusing every layer with flavor. Trust me, this method works wonders!
Add Your Touch
Want to personalize your Chicken Handi? Swap out the usual spices for a blend of your favorites. A dash of smoked paprika can add a lovely smoky depth. Or perhaps a pinch of dried fenugreek leaves for an extra earthy note? It’s all about making it yours!
Storing & Reheating
Leftover Chicken Handi is a gift! Store it in an airtight container in the fridge for up to three days. Reheat gently on the stovetop over medium-low heat, adding a splash of water or broth if needed, until heated through. Avoid microwaving to prevent rubbery chicken!
Three tips to elevate your Chicken Handi game:
- Marinate the chicken for at least 30 minutes (or even overnight!) in yogurt and spices. This will tenderize the meat and infuse it with flavor from the inside out.
- Don’t overcrowd the pan when searing the chicken. Sear in batches to achieve a beautiful, golden-brown crust which is crucial for flavor development.
- Garnish generously with fresh cilantro and a squeeze of lemon juice right before serving. This brightens up the dish and adds a pop of freshness.
(Personal anecdote formated as paragraph subheading)
I remember the first time I made this for my family, my little brother (the pickiest eater alive) actually asked for seconds! That’s when I knew I had nailed the recipe. The aroma alone was enough to transport us all to a cozy restaurant!
Delving into the Depths of Deliciousness: What is Chicken Handi?
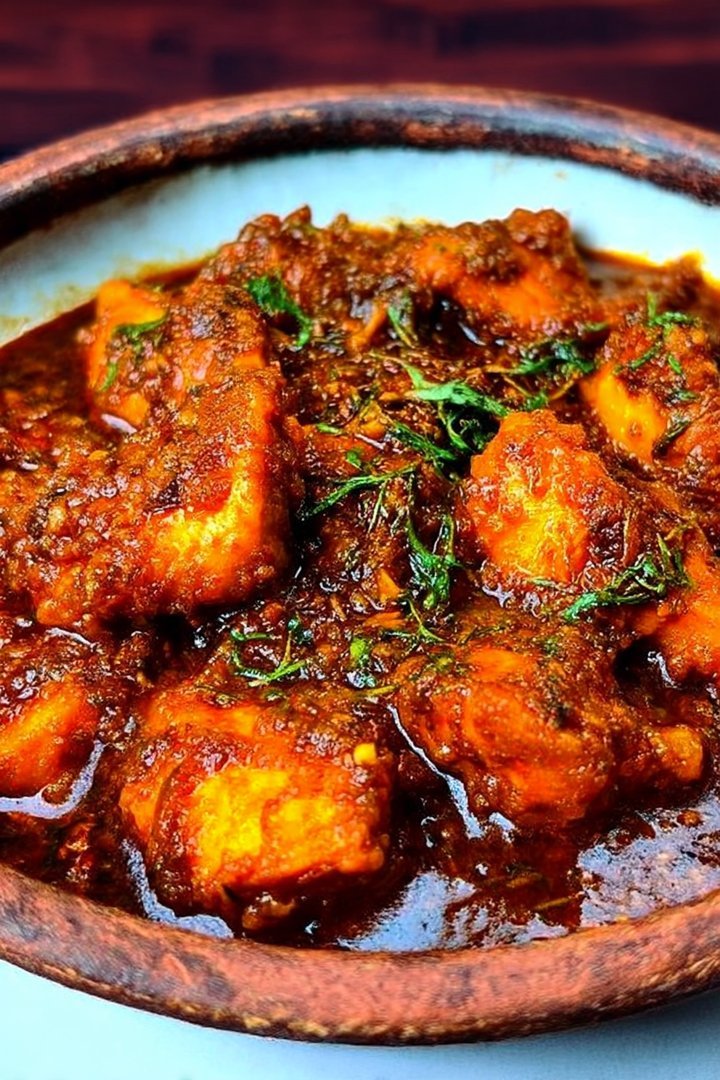
Chicken Handi, for those uninitiated into its culinary embrace, is a North Indian delight, traditionally cooked in a “handi,” which is an earthenware pot. This slow-cooking method allows the flavors to meld beautifully, resulting in a rich, creamy, and intensely flavorful chicken curry. Now, don’t fret if you don’t own a fancy handi; a regular heavy-bottomed pot or Dutch oven works perfectly fine! We’re all about accessibility here. The secret isn’t just in the pot, it’s in the love (and the spices!) that you pour into it. So, buckle up, buttercup, because we’re about to embark on a flavor-filled adventure on how to make Restaurant Style Chicken Handi right in your very own kitchen!
The Spice Rack Symphony: Assembling Your Flavor Arsenal
Before we dive headfirst into the cooking process, let’s gather our ingredients. Think of this as assembling your spice rack symphony orchestra. Each spice plays a crucial role in creating a harmonious and unforgettable flavor profile.
Here’s what you’ll need to conjure up this magical dish:
- **Chicken:** About 1.5 lbs of boneless, skinless chicken thighs, cut into bite-sized pieces. Thighs are preferred for their tenderness and ability to stay moist during cooking. But chicken breasts will work too.
- **Onions:** Two medium-sized onions, finely chopped. These form the base of our flavorful gravy.
- **Tomatoes:** Two large ripe tomatoes, pureed. Fresh is best, but canned tomato puree works in a pinch.
- **Ginger-Garlic Paste:** Two tablespoons. This dynamic duo is the backbone of Indian cuisine. You can buy it pre-made or easily make your own by blending equal parts ginger and garlic.
- **Green Chilies:** 2-3, finely chopped (adjust to your spice preference!). Adds a welcome kick!
- **Cashews:** ½ cup, soaked in warm water for at least 30 minutes. These will be blended into a smooth paste to add richness and creaminess to the gravy.
- **Plain Yogurt:** ½ cup, full-fat yogurt is preferable. It tenderizes the chicken and adds a tangy note.
- **Fresh Cream:** ¼ cup. For that luscious, restaurant-style finish.
- **Cilantro:** Fresh cilantro leaves, for garnish.
And now, the stars of the show: the spices!
- **Turmeric Powder:** 1 teaspoon. Adds color and earthy flavor.
- **Red Chili Powder:** 1-2 teaspoons (adjust to your spice preference!).
- **Coriander Powder:** 2 teaspoons. Adds warmth and depth.
- **Cumin Powder:** 1 teaspoon. Adds smoky and earthy notes.
- **Garam Masala:** 1 teaspoon. The quintessential Indian spice blend, adding warmth and complexity.
- **Dried Fenugreek Leaves (Kasuri Methi):** 1 teaspoon, crushed. Adds a unique, slightly bitter flavor.
- **Salt:** To taste.
- **Oil or Ghee:** For cooking.
The Handi Hustle: Step-by-Step Cooking Instructions
Alright, food adventurers, now for the fun part: putting it all together! Fear not, this recipe is surprisingly straightforward, even for kitchen novices. Just follow these simple steps, and you’ll be enjoying restaurant-worthy Chicken Handi in no time.
**Step 1: The Chicken’s Spa Day**
In a bowl, combine the chicken pieces with yogurt, turmeric powder, red chili powder, ginger-garlic paste, and salt. Mix well, ensuring every piece of chicken is coated in this flavorful marinade. Cover and refrigerate for at least 30 minutes, or preferably longer. This is like a spa day for your chicken, allowing it to soak up all the deliciousness.
**Step 2: Sautéing the Soul of the Curry**
Heat oil or ghee in a heavy-bottomed pot or Dutch oven over medium heat. Add the chopped onions and sauté until golden brown and caramelized. This step is crucial for developing the depth of flavor in your curry. Be patient and let the onions work their magic.
**Step 3: Spice It Up!**
Add the ginger-garlic paste and chopped green chilies to the pot and sauté for another minute until fragrant. Then, add the tomato puree, coriander powder, cumin powder, and salt. Cook for about 5-7 minutes, stirring occasionally, until the tomatoes have thickened and the oil starts to separate from the mixture. This is where the real magic begins!
**Step 4: Cashew Cream Dream**
In a blender, combine the soaked cashews with a little water and blend into a smooth paste. This cashew cream will add richness and body to your gravy.
**Step 5: Chicken Takes Center Stage**
Add the marinated chicken to the pot and cook for about 5-7 minutes, stirring occasionally, until the chicken is browned on all sides.
**Step 6: Simmering to Perfection**
Add the cashew paste and about 1 cup of water to the pot. Bring to a simmer, then reduce the heat to low, cover, and cook for about 20-25 minutes, or until the chicken is cooked through and tender. Stir occasionally to prevent sticking. This slow simmering process allows the flavors to meld together beautifully.
**Step 7: The Grand Finale**
Stir in the garam masala and crushed dried fenugreek leaves. Cook for another 2-3 minutes. Finally, stir in the fresh cream for that luxurious finish.
**Step 8: Garnish and Serve**
Garnish with fresh cilantro leaves and serve hot with naan, roti, rice, or any other accompaniment of your choice. Prepare to be transported to a world of flavor!
Spice Level Adjustment: Taming the Heat or Kicking It Up a Notch
Not everyone has the same tolerance for spice, and that’s perfectly okay! This recipe is easily adjustable to suit your personal preferences.
- **For a milder curry:** Reduce or omit the green chilies and red chili powder. You can also add a dollop of yogurt or cream at the end to mellow out the heat.
- **For a spicier curry:** Add an extra green chili or a pinch of cayenne pepper along with the red chili powder. A dash of hot sauce can also do the trick.
Remember, you can always add more spice, but you can’t take it away! So, start with a smaller amount and adjust to your liking.
Beyond Chicken: Alternative Protein Options
While Chicken Handi is undeniably delicious, feel free to experiment with other protein options!
- **Lamb Handi:** Substitute the chicken with lamb pieces for a richer and more robust flavor. You may need to increase the cooking time slightly.
- **Beef Handi:** Similar to lamb, beef can be used as a delicious alternative. Choose tender cuts like stewing beef and adjust the cooking time accordingly.
- **Turkey Handi:** Ground turkey or turkey cutlets can be used for a lighter, healthier option.
Just remember to adjust the cooking time based on the type of protein you choose.
Plant-Based Power: Vegetarian Handi Variations
Craving a vegetarian version? No problem! This recipe is easily adaptable to a plant-based diet.
- **Paneer Handi:** Replace the chicken with paneer (Indian cheese) cubes. Add the paneer towards the end of the cooking process to prevent it from becoming rubbery.
- **Vegetable Handi:** Use a mix of your favorite vegetables, such as cauliflower, potatoes, peas, carrots, and bell peppers. Add the vegetables in stages, starting with the ones that take longer to cook.
- **Chickpea Handi:** For a protein-packed vegetarian option, use chickpeas. Add the chickpeas along with the tomatoes and spices.
The possibilities are endless! Get creative and use your imagination.
Perfecting the Cooking Process
To master how to make Restaurant Style Chicken Handi, follow this sequence: Sear the chicken first to lock in those delicious juices. While it’s sizzling, prep your spices and aromatics. Build your sauce in the same pan, infusing every layer with flavor. Trust me, this method works wonders!
Add Your Touch
Want to personalize your Chicken Handi? Swap out the usual spices for a blend of your favorites. A dash of smoked paprika can add a lovely smoky depth. Or perhaps a pinch of dried fenugreek leaves for an extra earthy note? It’s all about making it yours!
Storing & Reheating
Leftover Chicken Handi is a gift! Store it in an airtight container in the fridge for up to three days. Reheat gently on the stovetop over medium-low heat, adding a splash of water or broth if needed, until heated through. Avoid microwaving to prevent rubbery chicken!
Three tips to elevate your Chicken Handi game:
- Marinate the chicken for at least 30 minutes (or even overnight!) in yogurt and spices. This will tenderize the meat and infuse it with flavor from the inside out.
- Don’t overcrowd the pan when searing the chicken. Sear in batches to achieve a beautiful, golden-brown crust which is crucial for flavor development.
- Garnish generously with fresh cilantro and a squeeze of lemon juice right before serving. This brightens up the dish and adds a pop of freshness.
(Personal anecdote formated as paragraph subheading)
I remember the first time I made this for my family, my little brother (the pickiest eater alive) actually asked for seconds! That’s when I knew I had nailed the recipe. The aroma alone was enough to transport us all to a cozy restaurant!
Conclusion for How to make Restaurant Style Chicken Handi
Restaurant Style Chicken Handi is a dish that’s far easier to create at home than you might think. Remember to use quality ingredients, don’t be afraid to experiment with spice, and serve it with your favorite sides. With this recipe, you’ll be making a restaurant-quality dish that impresses everyone. So, grab your ingredients, put on your apron, and start cooking!
Print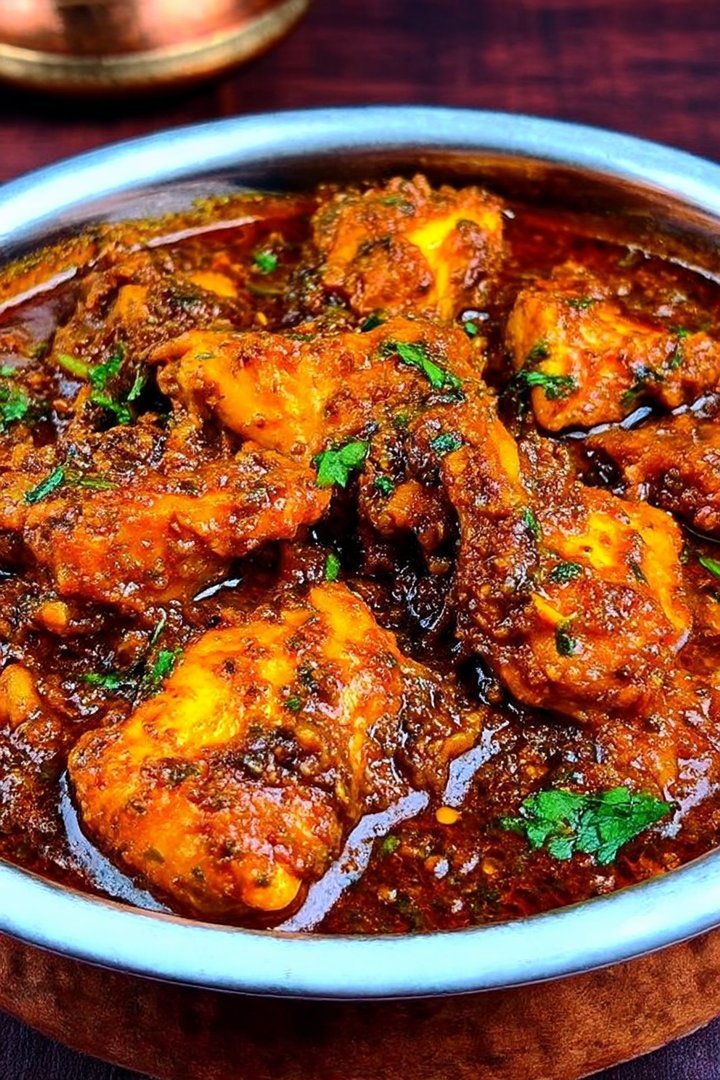
How to make Restaurant Style Chicken Handi
Delicious how to make restaurant style chicken handi recipe with detailed instructions and nutritional information.
- Total Time: 35 minutes
- Yield: 4 servings
Ingredients
- Chicken pieces (bone-in, skinless) – 1 kg
- Onion (finely chopped) – 2 large
- Ginger-garlic paste – 2 tablespoons
- Tomato puree – 1 cup
- Yogurt (plain, whisked) – 1/2 cup
- Red chili powder – 1 tablespoon
- Turmeric powder – 1 teaspoon
- Garam masala – 1 teaspoon
Instructions
- Step 1: Heat oil in a handi or heavy-bottomed pot. Add finely chopped onions and sauté until golden brown.
- Step 2: Add ginger-garlic paste and sauté for another minute until the raw smell disappears.
- Step 3: Add the chicken pieces and sauté until lightly browned on all sides.
- Step 4: Add tomato puree, red chili powder, turmeric powder, and salt to taste. Cook until the oil separates from the mixture, stirring frequently.
- Step 5: Stir in the whisked yogurt and cook on low heat for 15-20 minutes, or until the chicken is cooked through and the gravy has thickened.
- Step 6: Sprinkle garam masala over the chicken handi and simmer for another 2-3 minutes before serving hot with naan or rice.
Notes
- Refrigerate leftover Chicken Handi in an airtight container for up to 3 days.
- For best results, gently reheat the Chicken Handi on the stovetop over low heat, adding a splash of water if the gravy is too thick.
- Garnish with freshly chopped cilantro and a dollop of cream for an extra touch of elegance when serving.
- Browning the onions slowly and evenly is key to developing a rich, deep flavor in the handi.
- Prep Time: 15 minutes
- Cook Time: 20 minutes
- Method: Stovetop
- Cuisine: American
FAQs
Is it difficult to understand how to make Restaurant Style Chicken Handi at home?
Not at all! While it may seem intimidating, making Restaurant Style Chicken Handi is surprisingly straightforward. This recipe breaks it down into easy-to-follow steps, ensuring that even novice cooks can achieve restaurant-quality results. The key is to use fresh, high-quality ingredients and to follow the instructions carefully. Don’t be afraid to experiment with spices to adjust the flavor profile to your liking. And most importantly, have fun with it! With a little practice, you’ll be whipping up delicious Restaurant Style Chicken Handi in no time. Trust me; if I can do it, anyone can!
Can I substitute any of the ingredients for this Restaurant Style Chicken Handi?
Absolutely! One of the joys of cooking is the ability to customize recipes to your liking. If you are missing an ingredient for Restaurant Style Chicken Handi, feel free to make substitutions based on what you have on hand. For example, if you don’t have Greek yogurt, plain yogurt works just as well. You can also adjust the spice levels to suit your taste preferences. Just remember that substitutions may slightly alter the final flavor of the dish. Don’t be scared to get creative and experiment with different ingredients. That’s how you discover your signature touch!
How long does it take to understand how to make Restaurant Style Chicken Handi?
From prep to plate, you’re looking at roughly an hour. The actual cooking time is around 35-40 minutes, but some prep work is required. This involves chopping vegetables, measuring out spices, and marinating the chicken. This recipe for Restaurant Style Chicken Handi is perfect for a weeknight dinner. Plus, the aroma that fills your kitchen while it simmers is simply divine. So, clear your schedule for an hour, put on some music, and let’s get cooking Restaurant Style Chicken Handi!
What should I serve with the best Restaurant Style Chicken Handi?
Restaurant Style Chicken Handi is incredibly versatile, so you have many options! I personally love serving it with freshly baked naan bread or roti for dipping into that luscious gravy. Fluffy basmati rice is another excellent choice to soak up all the delicious flavors. For a lighter option, consider pairing it with a simple cucumber and tomato salad. A side of raita (yogurt dip) can also help cool down the heat if you’ve added extra chilies. Ultimately, the best side dish is the one you enjoy the most.


Leave a Comment